Thursday, March 31, 2011

Dining Room Plate Re-Do

About 7 years ago, my mom gave me these plates (below) and holder. I LOVED them and had a rooster theme for my kitchen.
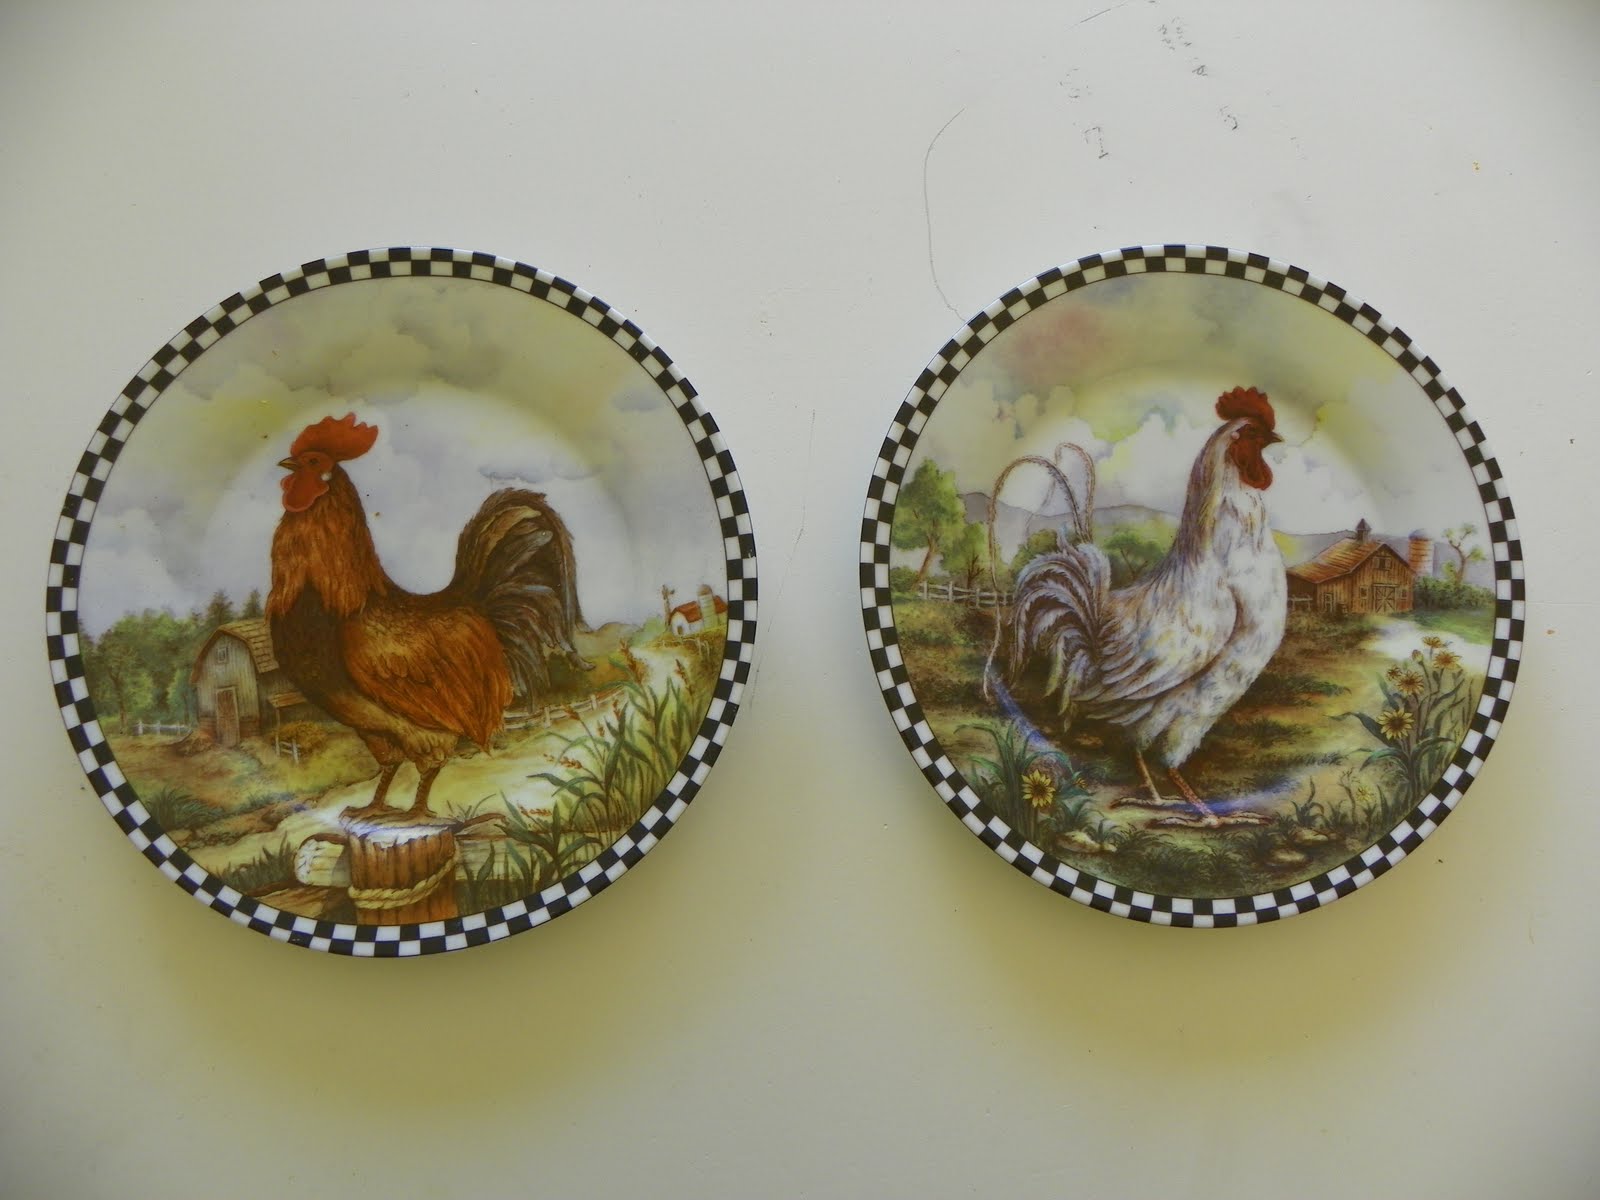
But, gradually my tastes changed and they aren't as much my style any more so I haven't had them up in my kitchen for a while. Yesterday I had an idea about how to change them to fit the theme of our dining room. I saw this idea from a guest blogger on my friend, Nina's blog, about making a canvas wall hanging using book pages and I started thinking about doing something similar for these plates. First, I scrubbed down the plates with hot water, dish soap, and a stiff brush to remove all the built up dust and grease from being in the kitchen for years and dried them thoroughly. Then, using leftover pages from a book I used to make my book wreath, I tore up approx.20 pages (give or take) into little squares and mod podged them onto the rooster plates and brushed mod podge over all of it. I wanted to put some sort of wording on it and figured I would do something simple. The two basic rules of dinner that our kids seem to have the hardest time following. Sit. and Eat. I used the Cricut machine with the Plantin School Book cartridge to cut the letters and then put them on the still wet mod-podged surface of the book pages. Then I brushed it with mod podge again (Have I mentioned how much I LOVE that stuff?). Then I just let it dry. That's it. Easy. Free. And now I love my plates again.

Wednesday, March 30, 2011

Another Simple wall art idea

I made this canvas for my friend's little boy's room. The theme of the bedroom was 'Things that Go' I guess you could say. The room was decorated so darling and I wanted to make a piece of artwork to go along with it. So, I bought a blank canvas, painted the back ground, painted the airplanes, and used my Cricut machine to cut out the lettering to add. Then I mod-podged the letters to the canvas and covered the letters with Mod Podge as well to seal it. Easy and custom made to match any decor.
Here are some more wall art pieces I did to match the bedding for my daughter's room.
(here's the bedding) Same idea as the previous ones. I cut out scrap booking paper and used paint to add the details, and used mod podge to seal the whole thing. I really love that you can mix and match mediums to put together the whole thing because it gives many more options and is much more forgiving than just paint.

Monday, March 28, 2011

Stuffed Pizza Rolls

My kids LOVE finger foods. We had these for dinner the other night and they were SO good. I found the recipe over at Our Best Bites. I just made cheese ones and dipped them in marinara sauce but the possibilities are endless.

Wednesday, March 23, 2011

Recycled Crayons

What do YOU do with all of your old, broken crayons?  Ordinarily I would have just thrown them away in the fall when crayons are dirt cheap for Back to School sales.  However, now I like to hold on to them to use for this project.  I originally came across this project at Rhythm of the Home.  It seemed like an easy craft for the kids to do and they actually really enjoyed helping out.  Basically, you:

1. peel your old, broken crayons


2. sort them, melt them down in a shaped pan (I've seen ones done in silicone pans too that had really awesome shapes such as fish, etc.)


3. let them cool, pop them out, and...


voila! Brand new cool crayons ready to color with.
(for the full tutorial, click here)


Monday, March 21, 2011

Oreo Truffles

My wonderful friend, Jo Lynn, shared this recipe with me.  She was given some of these truffles at Christmas time and had to have the recipe.  She told me about them but I was still pleasantly surprised when I tried them. They are SO good!  Relatively easy to make, too.  Unfortunately, they are not super healthy and they are extremely addicting so beware. :)

Oreo Truffles

  • One package of Oreo cookies (I like to use flavored ones like mint or peanut butter--mint is our favorite)
  • One package of cream cheese (you can use fat free-- they still tasted good)
  • Almond bark or chocolate (not exactly sure on the amount.  Enough to coat all the truffles)
1. In a Cuisinart or blender, crush the entire package of cookies including the inside filling. (I broke them up and blended them a few cookies at a time in my Magic Bullet)

2. Soften cream cheese and mix with oreos in a large bowl.

3. Cream together until well blended. 
4. Roll into balls (approx. 2 dozen) and lay on a baking sheet covered in wax paper.  I like to use    gloves for this part so that there is less hassle.  
5. Chill until they firm up and set aside.
6. Melt your chocolate until it is a good consistency for dipping.  
7. Dip oreo cream cheese balls in chocolate and place back on was paper.  Chill until they harden. (If you desire, you can decorate with festive sprinkles before the chocolate hardens).
8. Enjoy!


Wednesday, March 16, 2011

Iron Man Doll

 
My four and a half year old son LOVES Iron Man.  He can't get enough of him.  He has the costume, the gloves, the movies, the mask (2, actually), an Iron Man wrist disc-shooter, 3 action figures, and a hat. 

Still,  I couldn't resist making him a doll out of felt that was soft to sleep with in his bed. I first cut out the figure a couple of weeks ago, but didn't finish the whole figure because I wasn't sure I could get the mask to look quite right.  Yesterday I mentioned to my husband that I probably wasn't going to end up making it because I didn't think I would like how it turned out.  I was surprised by his reaction.  He really wanted me to finish it, knowing that my son wouldn't have care nearly as much about the details.  I am glad that I went ahead and finished it because my husband was right.


My son LOVES it and takes it every where he goes.  I wish I had used a little bit better quality of felt because it's already looking a little fuzzy but that was bound to happen eventually, I guess.

Monday, March 14, 2011

Felt Food!

My sweet little baby will be turning ONE! in a few months.  WAY too soon for me. I still can't believe it.  But what do you get for a baby that has three older siblings? We have so many different toys for all different ages.

Way back before Christmas, I found a little play kitchen on sale at Wal Mart.  It cost $16 including the shipping!  We had an old play kitchen that we bought for our oldest daughter over 5 years ago, and even then we had purchased it used.  So, this new kitchen from Wal Mart was too good to pass up. 


When I came across this idea for felt food, I knew I had to make some to go with the kitchen.   I think these are SO cute and are not too challenging to make.  (I am not that great of a seamstress but I could totally handle this).   

I have so many more kinds of food that I am dying to make but this is what I have started so far.  I originally found the idea at One Crafty Mumma, but since have found tons of more blogs that have different ideas. There is a whole list of places at homemade by jill.  I might come up with a few more of my own as well.  It is totally addicting!
Bow-Tie Pasta and Marinara Sauce
Egg, Bacon, and Tomato Slices
Ice Cream Bar and Fudgescicle
Raviolis with Marinara Sauce
Pancakes w/ Syrup and Butter, Bacon
Lemon and Orange slices

Sunday, March 13, 2011

Wall Art


When I get a little tired of the decor in my living room, I like to try to change things up as inexpensively as I can. I find that if I can change up some of the photographs on the wall, that can do the trick. So, a few days ago, I drove up the rode (about 2 minutes) and took this picture.


Now, we live (obviously) in San Francsico- which provides an endless number of photographic opportunities. I am determined to try to photograph a few of my favorite ones to take with us where ever we go after this.


I downloaded the picture to the Costco website and picked it up that afternoon (for like $3), bought a $12 frame at Ross, and was done.


Here is another one I did a little while back. I printed it out, and Mod-Podged it to a canvas that I painted black.


This last one is a picture of my kids that we used for our Christmas card. I really love using the amazing scenery here as background and it brings a little feel of the city into our home.


Thursday, March 10, 2011

Jumping on the Book Wreath Bandwagon

I originally found the idea for this wreath HERE. I fell in love with it on the spot. Later, I saw it on a few blogs, where apparently, others had fallen in love with it, too. Even though it seems to be quite popular, I couldn't resist jumping on the bandwagon and making one of my own. So here it is...
I especially love that this wreath cost me $2! Dollar Tree has the books and the wreath and the glue sticks and paint were already on hand. I love an inexpensive project!

Wednesday, March 9, 2011

Birthday Cakes 4

Princess Castle
Ocean-themed cake Dora the Explorer

Birthday Cakes 3

Tiger
1st Birthday Cake
Butterfly Cake
Trains

Birthday Cakes 2

Mommy cat with her kitties Legos Treasure Chest (this was one of my favorites! It looked cool and was relatively easy to make)
Puppy

Birthday Cakes 1- Super Heroes

So, since this blog is for me to document and keep track of my previous projects as well as the current ones, I am going to do a few posts on the birthday cakes that I have made over the years.

The Incredible Hulk

My husband wanted a landscape w/ moveable action figures that could battle on his 30th b-day cake :) Iron Man
Super Heroes have been HUGE at our house for a couple of years now. That explains why there have been so many variations of super heroes depending on which boy's birthday it was.