Showing posts with label Cricut. Show all posts

Sunday, December 18, 2011

Preschool Welcome Board

During our preschool welcoming exercises, the kids sing "Here We Are Together". This is the little board I came up with so that the kids can place their 'person' at the school when we sing each of their names. The cutouts are from the "Everyday Paperdolls" cartridge using the Cricut machine. I borrowed the cartridge from a friend and it's really fun. I wanted "L" to have leggings so I just eyed those but I love the Crocs that "M" is wearing and there are so many options with that cartridge. I added the detail with a Sharpie marker and then laminated each of them. They stick to the schoolhouse(which I was too cheap to laminate so I covered in Contact paper) using sticky-back Velcro. I taped a small manilla envelope to the back to store the paperdolls when not in use as well. The kids' school is called "Happy Hands Preschool" which is why there is a hand at the top of the school in place of the bell- (I thought it might seem a little creepy without an explanation).
The kids get so excited to put their person on the board and I like that they each get to feel special when we sing each of their names every week.

Wednesday, April 20, 2011

Mother's Day Gifts

My daughter's 1st grade teacher asked if I would be willing to come up with a little gift that the kids could make to give to their moms on Mother's Day. I was honored and super excited. I wanted it to be relatively inexpensive and simple so I decided to reuse the HUGE collection of baby jars we have around the house and make tea light candles. I had originally planned on letting the kids etch the word 'mom' onto the jar, but then rejected the idea since that would require letting the kids use the etching cream which can be dangerous and tricky to work with. So, I switched to acrylic paint instead.
I cut out the word "mom" on contact paper using the Plantin Schoolbook cartridge on my Cricut machine. Then I peeled off the back and stuck it on the baby jar, creating a stencil. The kids hot glued the ribbon around the top of the jar and then painted the lettering on the stencil. When it was dry, we peeled off the contact paper and placed the tea light candle inside. Total money spent for 22 candles: around $1 Then we made these candy bar wrappers for their 'sweet' moms which are pretty self explanatory. We put this quote from Abraham Lincoln on the back: Then the kids put both items in a plain white paper lunch bags that they decorated, put two hole-punches on the top, tied them with curly ribbon. It ended up being what I had hoped for: inexpensive, easy, and made the kids excited to have a homemade gift for their moms.

Saturday, April 2, 2011

Easter Egg Stand

I had the chance to go to DI (Deseret Industries) last week. I LOVE that place and am so sad we don't have one closer. I bought this whole stand w/ eggs (below) for $1.
I just repainted the eggs, mod podged Easter themed silhouettes onto the eggs, and scrubbed them stand to make it look good as new. Fast project and it only cost $1!
(before)
(after)

Thursday, March 31, 2011

Dining Room Plate Re-Do

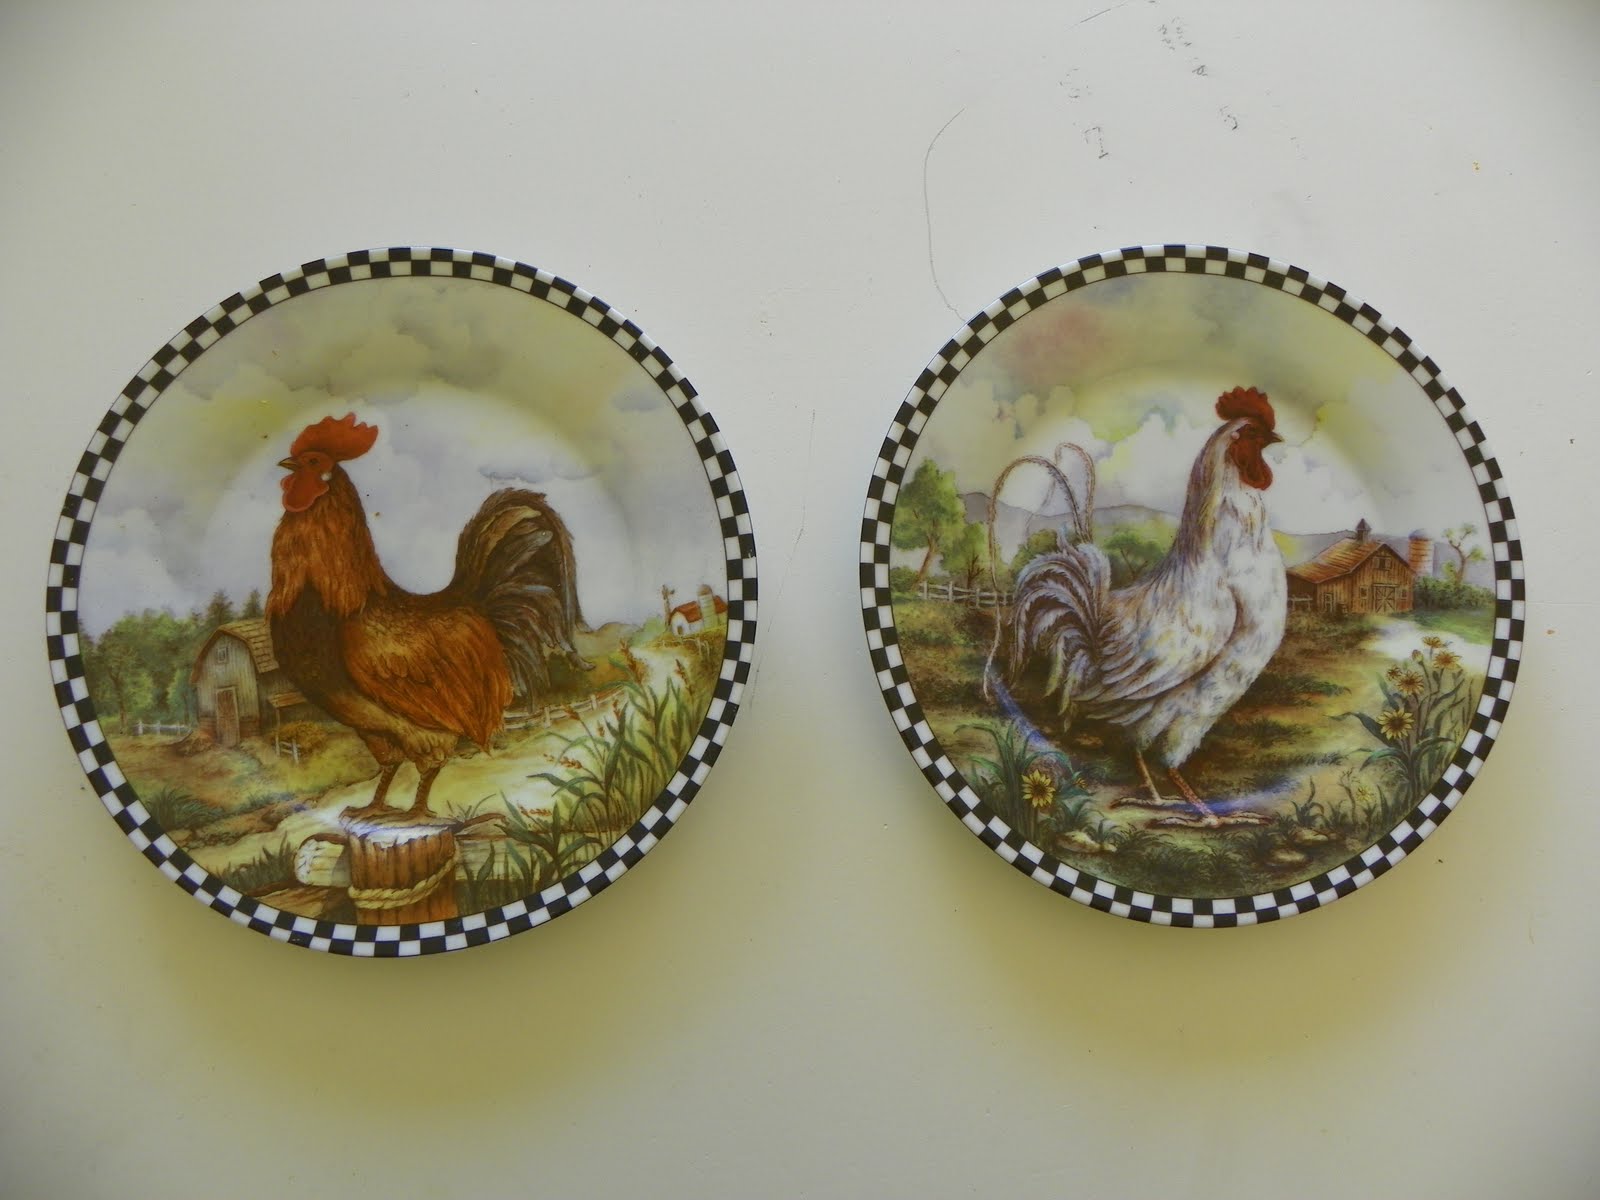
About 7 years ago, my mom gave me these plates (below) and holder. I LOVED them and had a rooster theme for my kitchen.
But, gradually my tastes changed and they aren't as much my style any more so I haven't had them up in my kitchen for a while. Yesterday I had an idea about how to change them to fit the theme of our dining room. I saw this idea from a guest blogger on my friend, Nina's blog, about making a canvas wall hanging using book pages and I started thinking about doing something similar for these plates. First, I scrubbed down the plates with hot water, dish soap, and a stiff brush to remove all the built up dust and grease from being in the kitchen for years and dried them thoroughly. Then, using leftover pages from a book I used to make my book wreath, I tore up approx.20 pages (give or take) into little squares and mod podged them onto the rooster plates and brushed mod podge over all of it. I wanted to put some sort of wording on it and figured I would do something simple. The two basic rules of dinner that our kids seem to have the hardest time following. Sit. and Eat. I used the Cricut machine with the Plantin School Book cartridge to cut the letters and then put them on the still wet mod-podged surface of the book pages. Then I brushed it with mod podge again (Have I mentioned how much I LOVE that stuff?). Then I just let it dry. That's it. Easy. Free. And now I love my plates again.

Wednesday, March 30, 2011

Another Simple wall art idea

I made this canvas for my friend's little boy's room. The theme of the bedroom was 'Things that Go' I guess you could say. The room was decorated so darling and I wanted to make a piece of artwork to go along with it. So, I bought a blank canvas, painted the back ground, painted the airplanes, and used my Cricut machine to cut out the lettering to add. Then I mod-podged the letters to the canvas and covered the letters with Mod Podge as well to seal it. Easy and custom made to match any decor.
Here are some more wall art pieces I did to match the bedding for my daughter's room.
(here's the bedding) Same idea as the previous ones. I cut out scrap booking paper and used paint to add the details, and used mod podge to seal the whole thing. I really love that you can mix and match mediums to put together the whole thing because it gives many more options and is much more forgiving than just paint.

Wednesday, March 9, 2011

Family Home Evening Chart

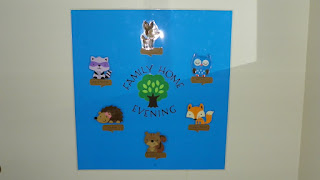
At our house, every Monday night is Family Home Evening, or Family Night. We have a basic outlined program: Opening Song, Prayer, Lesson, Activity/Game, Treat, and Closing Prayer. It's our kids' favorite night of the week (and honestly, one of mine too, since we make it a point to let nothing else get in the way). In order to remember who has which assignments, I finally got around to making a rotating chart of each family member and their assignment. I trimmed the poster board and got it laminated (which ended up costing $10) at Office Max. I made the animals using my Cricut and the "Create a Critter" cartridge. I totally love woodland animals lately, so that became the theme of the chart. Each log that the animals sit on represents an assignment and each critter is a family member. I attached the animals to the chart using sticky-back Velcro.
My 3 year old son cannot help himself. He LOVES the animals and has a hard time resisting the temptation to take them down and play with them. I might have to make him a few...

Organizing the Playroom

Our kids have a lot of toys. Good toys, but still-- a lot. Keeping them organized in our apartment is important for me so that I don't mind having so many.
Our solution, for now, is using storage bins and these modular white shelves that you can build to whatever shape you need. I am not in love with the unattractive gray bins, but since we've moved 8 times in 8 years, they are extremely functional, so for now- they will have to work. The one problem with the shelving is that it can come apart if you put too much pressure on it, and the bins are a little heavy.
An easy fix to that problem is using plastic cable ties (sold at Dollar Tree). I bought some at Wal Mart that are white and blend in to the shelving. I tied them tight and cut off the excess. In order to encourage the kids to keep the bins organized, I made labels for them by using my Cricut machine. I laminated the labels and taped them on using clear packaging tape. That way I can reuse them or rearrange them if necessary.
The labels made the kids excited all over again about each toy bin. My four year old is also excited because he is starting to read and the words, accompanying the pictures, on each label are making it easy for him recognize familiar words.